In our introduction to Project 50/50, we talked about the basic specifications of the laptop, and about some upgrades that could happen in the future. Before all that happens though, we’ve got to be sure we’re starting with a solid foundation. Let’s face it: If the laptop is a piece of junk, the project will fail no matter what.
Before I purchased the v5000 laptop, I did some googling around and found reviews online that were done in 2006 when the laptop was new. It got overall good reviews, and was available in several configurations. The screen was noted for being a bit dim (I disagree) but otherwise looked to be solid. But that was 2006. This is almost 8 years later! A lot can happen in 8 years. So a full inspection of the laptop was in order.
Checking The Hardware
Dear Reader,
If this article series and this blog only serve to entrust you with a single bit of wisdom, may it be this: Never Trust Used Hardware! This specifically includes Hard Drives and Memory. Fortunately, there are many ways you can test both the Memory and Hard Drive. They are neither difficult or time consuming.
Most Linux distributions these days come with MemTest86+ installed as a boot option. I used this to test the memory. It only took half an hour, and the memory passed 100% with no failures. With that out of the way, I checked the Hard Drive.
This took a bit more work and detail but was worth it. I prefer to use http://gparted.org/‘s live CD. It works beautifully for everything from hard drive testing to copying data from dying hard drives to live ones.
I used the gparted live CD to run “dd” which is a Linux command for dumping data from one device or file to another device or file. In this case, I used it to read data from the laptop’s hard drive, (/dev/sda) and dump it into the bit bucket (nowhere, /dev/null) simply to see how quickly it was read and if there were any errors.
The hard drive read at a reasonable-but-not-great rate of 49MB/sec, and with no errors. I specifically checked the first 20GB of the disk. For the Linux nerds, the command I used was this:
dd if=/dev/sda of=/dev/null bs=1024k count=20000
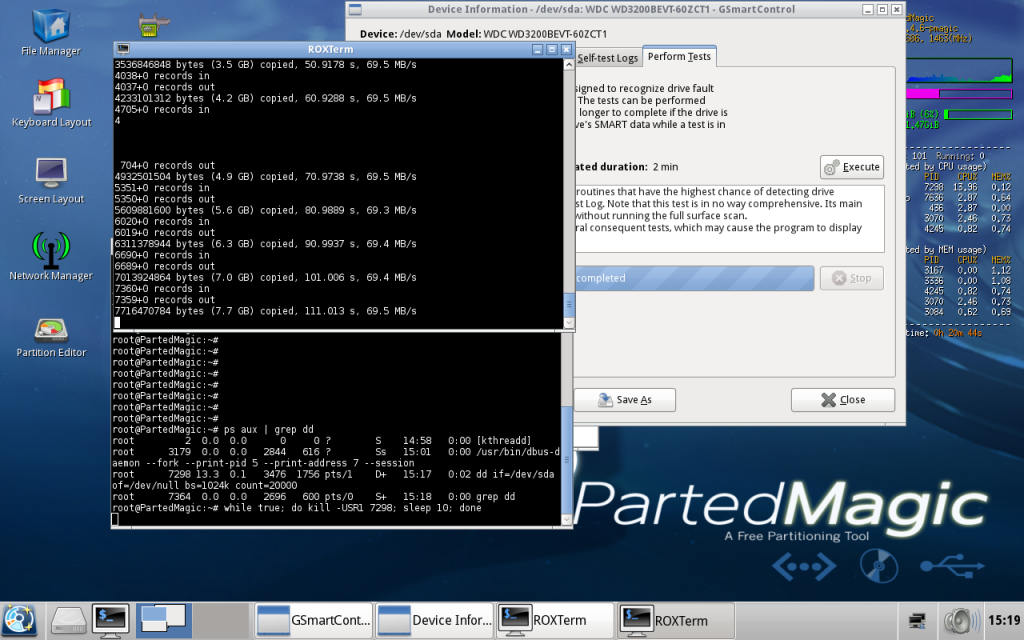
That’s “input file” of the hard drive, “output file” of /dev/null, block size of 1024k (1MB) and 20,000 of them (20GB). Here’s how it looks while it is running:

These two windows show the command and a script I use to give me a status every 10 seconds. The speeds shown are on the 320GB drive I installed.
Unfortunately, I was none too happy with the results. 49MB/sec is not a great speed, but it is not horrible either. What bothered me more was the number of reallocated sectors on the disk. This indicates that certain spots on the disk have failed and have been moved for safety. Too many of those, and there are bound to be more.
In my cabinet though, was a Western Digital 320GB SATA 2.5″ hard drive. I installed it and re-ran the tests. There were also reallocated sectors, but fewer. One thing I found when replacing the disk though made me *very* glad I did. The 120GB drive is a Toshiba, and it is Referbished. Friends don’t let friends use refurbished hard drives!
The screen is in good shape, with a couple of minor scratches, and not really anything to be concerned with. My wife even commented that it was easy to look at.
Next up: Installing CrunchBang Linux from a USB Flash Drive.


